

Posted by Emily Midgett
on March 30, 2021

Hi there! Emily Midgett with you today, and I have a super springy project to share with you using the Hero Florals Poppy stamp set from the latest Spring Catalog release! This time of year always puts me in a peach and navy mood. There's something so clean and fresh about that color combination. Luckily, poppies come in such a huge variety of colors that it was easy to bring this color combo to life with a feminine, fresh card! Let's get started with the details.

I began by using my T-square to lightly pencil a straight line across my white card front, slightly lower than halfway down. I then used Post-It Notes to mask all the way across. I wanted to showcase a little poppy garden popping up with a patterned section across the bottom, so next, I stamped a variety of the poppy stamps from Hero Florals Poppy using the new Contour Ink, rotating the stamps slightly to angle them more naturally. I used Copic markers to color the images in a pretty shades of peach and green for some no-line coloring.

Once I had finished my Copic coloring, I removed the Post It-Notes and adhered them to the opposite side of my pencil line so that the blank bottom portion of the card front was now visible. I then used the Crossing Waves Stencil, a blending brush, and Fresh Peach ink to blend a pretty pattern on the white area. I also used another blending brush to blend some subtle blue edges using Soft Sky ink.
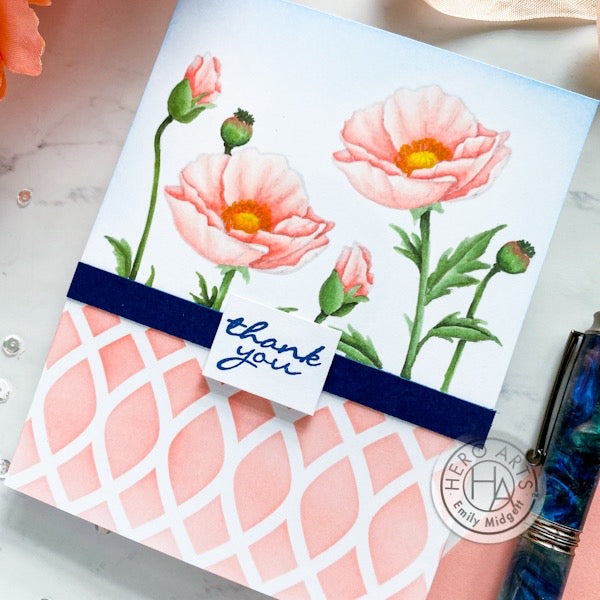
I trimmed a strip of Nautical cardstock and adhered it to the spot where the stenciled, patterned portion of the card base met the poppy background. Using this slightly thicker strip of navy cardstock helps to break up the busy-ness of the two patterns and create a bit of a barrier between them. I stamped a greeting from Hero Florals Poppy using Navy ink, then trimmed it down to a small rectangle and popped it up using foam adhesive to help it stand out a bit.
Well, that's all for my project today! I am so excited for springtime and watching all of the beautiful flowers bloom. If you are as excited as I am to make flowery, springy cards, you should check out the current Stay Crafty With Hero challenge: Bring On Spring!!

Enter your projects by April 8, 2021 to be eligible to win a $50 Hero Arts shopping spree.
Thanks so much for stopping by, and have a marvelous day!

|























































































7 comments
I enjoyed reading how you were able to achieve such a lovely result!
Love this peach and navy card! The poppies are beautiful! Thanks for sharing.
Beautiful! Love your no line colouring – such soft colours.
Love the clean crisp look of this card.
I never would have thought of combining peach and navy! Love it. And such a clean, simple design.