
One Card Design 2 Ways - Sending You Strength Card
on November 13, 2017

One Card Design 2 Ways - Sending You Strength Card

Hello everyone, this is Yana Smakula and thank you for joining me! Today I’d like to share a photo tutorial featuring one card design 2 ways. By changing up the papers and colors you can easily stretch a card design and get a completely different look.

Here's a look at the green/copper card:

One Card Design 2 Ways - Sending You Strength Card by Yana Smakula for Spellbinders. Using: S4-732 Curled Grace Oval, S4-705 Graceful Brackets, SDS-055 Beautiful Dreamer Stamp And Die Set, S6-001 5x7 Matting Basics A, S6-002 5x7 Matting Basics B Dies

And here's identical project done in pink/gold:
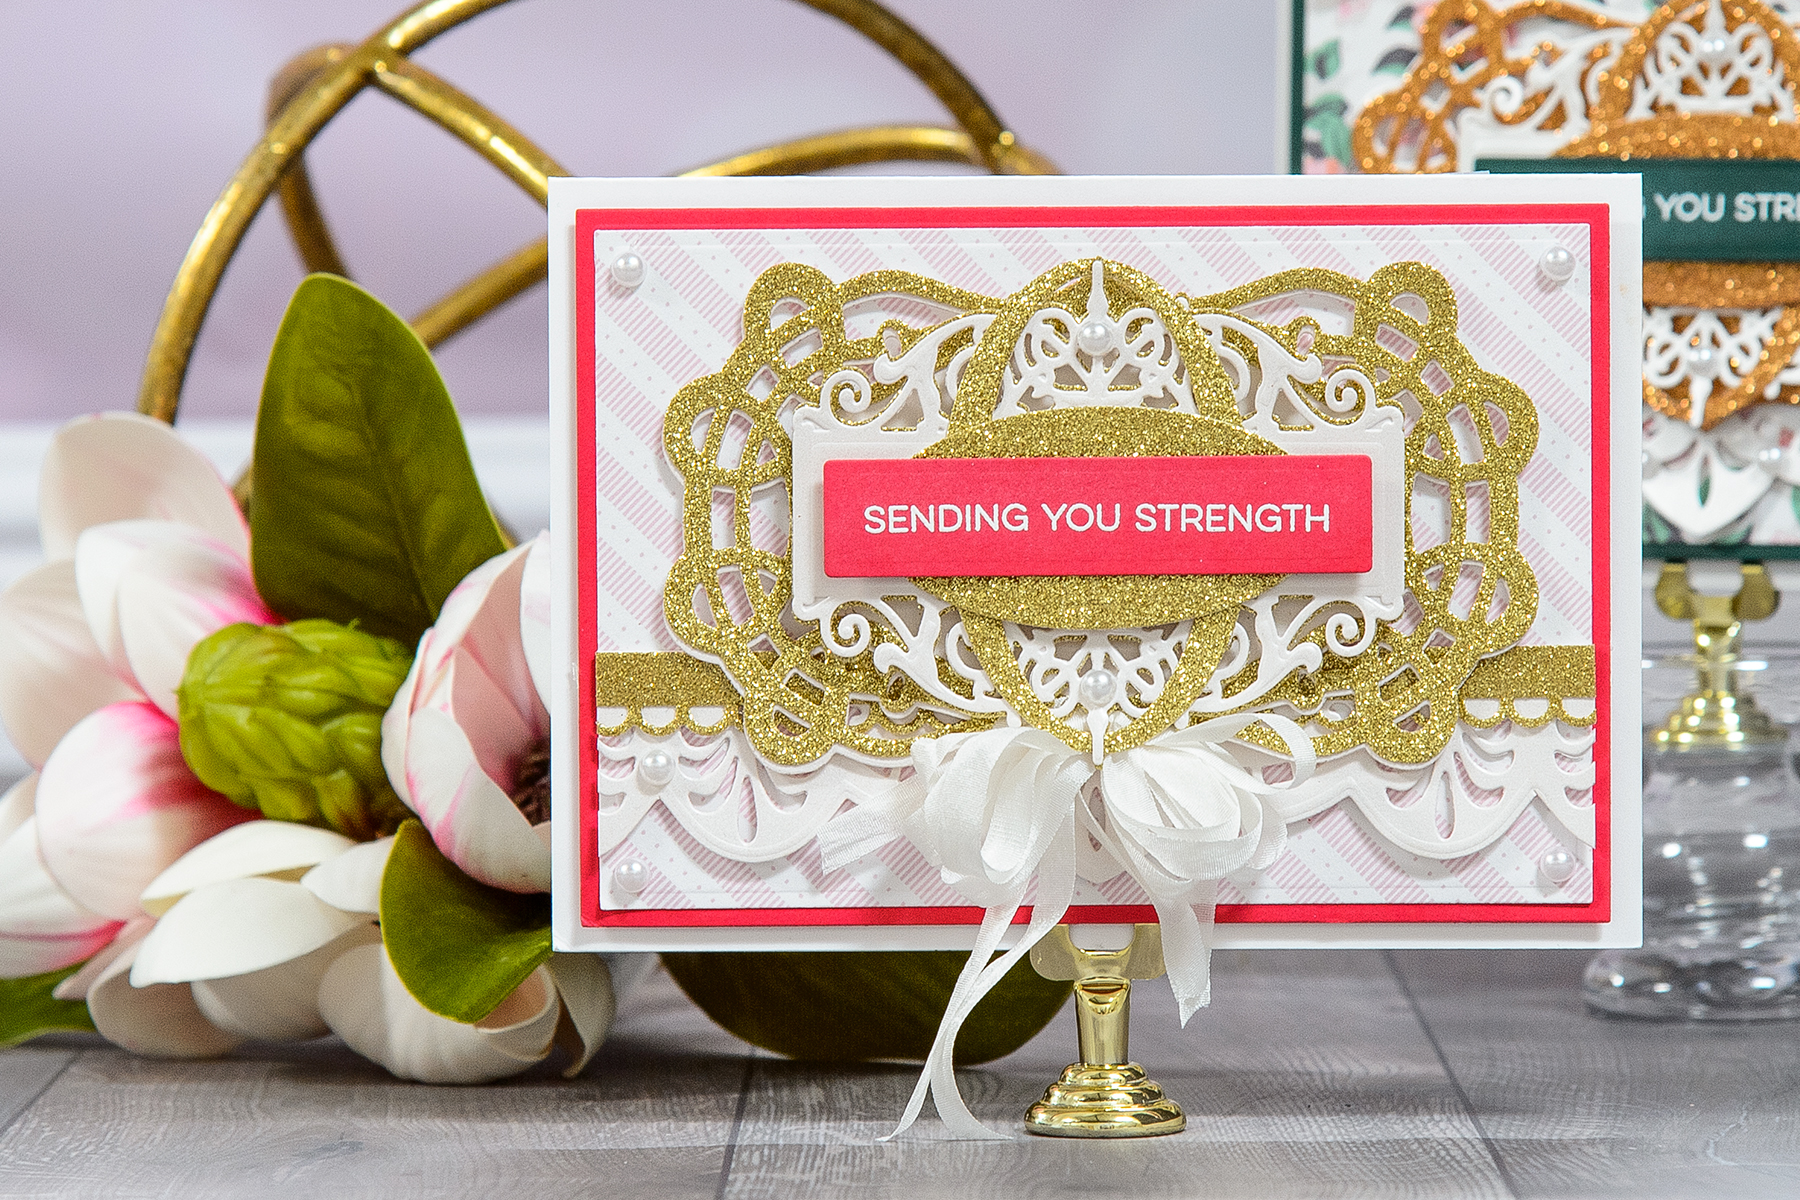
One Card Design 2 Ways - Sending You Strength Card by Yana Smakula for Spellbinders. Using: S4-732 Curled Grace Oval, S4-705 Graceful Brackets, SDS-055 Beautiful Dreamer Stamp And Die Set, S6-001 5x7 Matting Basics A, S6-002 5x7 Matting Basics B Dies

This card was published in the Die-cutting Essentials Magazine Issue 25 along with a few other cards done in a similar style - check it out for more inspiration.
Instead of filming a video for this project, I put together a simple photo tutorial describing every step of the cardmaking process. Also, follow my written instructions below for more info:

One Card Design 2 Ways - Sending You Strength Card by Yana Smakula for Spellbinders

Instructions:

Begin by creating a 5x7” landscape top folding card base out of white cardstock. I used thick 110 Neenah Solar White paper for this. Die-cut panels out of dark green cardstock and patterned paper using dies from 5x7 Matting Basics A and B sets. Adhere the two together. Use foam adhesive to adhere onto the card base (I used a solid layer of fun foam to make my card sturdier).

One Card Design 2 Ways - Sending You Strength Card by Yana Smakula for Spellbinders. Using: S4-732 Curled Grace Oval, S4-705 Graceful Brackets, SDS-055 Beautiful Dreamer Stamp And Die Set, S6-001 5x7 Matting Basics A, S6-002 5x7 Matting Basics B Dies

Die-cut a border by using dies from the Graceful Brackets set out of copper glitter and white pearlescent cardstock. Since the card is wider than the bracket border itself you’ll need to elongate the border by continuing the cut on left and right sides. Adhere copper glitter border cut onto pearlescent border and both card base.

One Card Design 2 Ways - Sending You Strength Card by Yana Smakula for Spellbinders. Using: S4-732 Curled Grace Oval, S4-705 Graceful Brackets, SDS-055 Beautiful Dreamer Stamp And Die Set, S6-001 5x7 Matting Basics A, S6-002 5x7 Matting Basics B Dies

Die-cut main element using dies from the Curled Grace Oval set out of copper glitter and White pearlescent cardstock (use Outer Border and Inlaid Curls dies). Adhere copper glitter die cut onto pearlescent die cut and offset slightly. Foam mount onto the card.

One Card Design 2 Ways - Sending You Strength Card by Yana Smakula for Spellbinders. Using: S4-732 Curled Grace Oval, S4-705 Graceful Brackets, SDS-055 Beautiful Dreamer Stamp And Die Set, S6-001 5x7 Matting Basics A, S6-002 5x7 Matting Basics B Dies

Die-cut label from the Beautiful Dreamer Stamp And Die set out of pearlescent cardstock. Die-cut Outer Oval and Inner Oval dies from the Curled Grace Oval set out of copper glitter cardstock. Attach the oval frame onto the label as shown, foam mount onto the card. Foam mount solid oval shape.

One Card Design 2 Ways - Sending You Strength Card by Yana Smakula for Spellbinders. Using: S4-732 Curled Grace Oval, S4-705 Graceful Brackets, SDS-055 Beautiful Dreamer Stamp And Die Set, S6-001 5x7 Matting Basics A, S6-002 5x7 Matting Basics B Dies

Die-cut insert from the Beautiful Dreamer Stamp And Die Set out of green cardstock. Heat emboss sentiment in white embossing powder, foam mount onto the card.

Embellish with white pearls.

Spellbinders Supplies:

Other supplies:

First Edition Sweet Nothings 12x12 Paper Pad; Cardstock: Neenah Solar White 110 LB cardstock, My Colors Cardstock Hunter Green 12x12 cardstock, My Paper Studio Solid Glitter Copper 12x12 cardstock, White pearlescent cardstock; White Self Adhesive Pearls; Adhesive: Scrapbook Adhesives 3D Foam Squares, My Favorite Things Essential Sentiments Stamp; Hero Arts White Embossing Powder; Versamark Embossing Ink Pad. Thank you so much for stopping by today and have fun die cutting!

Leave a comment

Your email will not be published. Please note, comments need to be approved before they are published.


  • How to Color BetterPress Scenes with Watercolor and Colored Pencils, BP-383, STNB-020, DC378

    AF724

    How to Color BetterPress Scenes with Watercolor and Colored Pencils

    Want to move beyond simple ink blending when using layering stencils? In this tutorial, you'll learn how to combine BetterPress printing, stencil coloring, watercolor painting, and colored pencil shading to create a detailed scenic card. By mixing coloring mediums, you can build additional texture, depth, and realism while using supplies you may already have in your craft room. This project features the Scenic Kyoto Press...

  • How to Use Reverse Foiling for Elegant Christmas Cards, BP-345, BP-314, S4-1452, BP-312, S5-526, S5-647

    BP-312

    How to Use Reverse Foiling for Elegant Christmas Cards

    Get more from your hot foil supplies by learning how to use the reverse foiling technique. In this step-by-step Christmas card tutorial, you'll create a beautiful snowflake background using leftover foil, then pair it with a dimensional poinsettia arrangement and festive sentiment. Reverse foiling is a fantastic way to reduce waste while creating an entirely different look from your original foiled design. Using the A2...

  • How to Make Felt Christmas Ornaments with Festive Felt Dies, S7-302, S7-303, S7-305, PE-104

    Categories:Die Cutting

    How to Make Felt Christmas Ornaments with Festive Felt Dies

    Create charming handmade felt Christmas ornaments using the Festive Felt Christmas Dies by Lollie & Grace. In this step-by-step tutorial, you'll learn how to die-cut felt, assemble layered ornament designs, add decorative stitching, embellish with sequins and beads, and finish your ornaments with hanging loops for Christmas decorating. This project is perfect for holiday crafters who enjoy working with felt and creating handmade decorations. These festive...