A Wintry Thank You - Hero Arts
Posted by Seeka SkyPaperScissors on December 20, 2022

A Wintry Thank You

Hello and welcome! Seeka here and today I'm sharing a wintry card that will be great for all those post-holiday thank yous.

I started off by using a large blending brush to blend Amethyst ink around the border of a 4.25" x 5.5" panel of Passion Flower cardstock, slightly offsetting the color a bit because I also planned to offset the stenciled snowflake pattern.

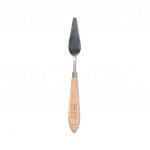
Next, I positioned the Snowflake Stencil over the panel, offset towards the right, and used painter's tape to temporarily hold it in place. Using a palette knife, I spread White Hero Paste over the stencil and onto the panel. I removed the stencil and then quickly washed it and the palette knife. Note that sometimes pastes will absorb ink so if you find that your paste turns a little bit purple and you prefer a brighter white, you can reposition the stencil and add another thin layer of paste.

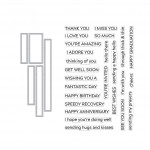
While the panel was drying, I created the sentiment by using the die in the Big Hugs Stamp & Cut set to cut Amethyst cardstock. I also cut the sentiment twice more from white cardstock. I layered and glued the three pieces together to create a sturdier sentiment and then I used foam tape to adhere it to the background. To finish, I stamped the small "thank you sentiment" (from the Message Strips Stamp & Cut XL set) in Onyx pigment ink before gluing the card front to a card base.

Thank you so much for visiting!

Click on products to shop:

SA202 Snowflake Stencil | Hero Arts

HA ]
DC283 Big Hugs Stamp & Cut - Hero Arts
HA ]
DC286 Message Strips Stamp & Cut XL
HA ]
AF720 Amethyst Core Ink | Hero Arts
HA ]
PS337 Hero Hues Premium Cardstock...
HA ]
PS318 Hero Hues Premium Cardstock...
HA ]
NK352 Hero Paste | Hero Arts
HA ]
HT215 Hero Tools Palette Knife
HA ]
MI006 Hero Tools Ink Blending Brush...
HA ]

Leave a comment

Please note, comments need to be approved before they are published.


  • Layered Snowflakes Christmas Card Tutorial with Hot Foil Sentiments

    BP-377

    Layered Snowflakes Christmas Card Tutorial with Hot Foil Sentiments

    1 comment

    Hi, crafty friends! Lea Lawson here with you today, creating a card featuring the beautiful new Layered Snowflakes die set. I’m sharing my step-by-step process in easy to follow photos and instructions! Step by Step Instructions: [gallery type="rectangular" columns="2" link="file" size="large" ids="lealawson-layeredsnowflake-step-1.webp,lealawson-layeredsnowflake-step-2.webp"] To start, turn on your Glimmer Hot Foil System, then let it heat up. Once the green indicator light notifies that the platform...

  • Infinity Trees Christmas Card Tutorial with Stamping and Ink Blending

    BP-377

    Infinity Trees Christmas Card Tutorial with Stamping and Ink Blending

    Hey there, crafty friends! It's Marie again from Marie Nicole Designs. Are you ready for Christmas? I believe that it is never too early to begin your Christmas crafting. I try to make Christmas cards throughout the year so when December rolls around, and I’m already overwhelmed by all the events going on, I have a stash already made. Today, I’ll be sharing an easy Christmas...

  • Gift Boxes Christmas Card Tutorial with Gift Boxes and Bags Etched Dies

    BP-001

    Gift Boxes Christmas Card Tutorial with Gift Boxes and Bags Etched Dies

    Hello crafters! It’s Lisa Tilson here with you today to share a card using the Snowflake Kisses Collection by Lisa Horton. I am going to be doing a step-by-step photo tutorial showing you how to create a Christmas card using the Gift Boxes and Bags Etched Dies and I’m using a more unconventional colour palette to make it. Sometimes it’s fun to create with colours...