

Posted by Ilina Crouse
on January 04, 2023

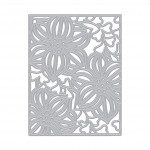
Hi everyone! Ilina here. Today I am sharing a birthday card made solely using dies, and no stamping. To make the card I used the Hearts & Blossoms Cover Plate along with the Celebrate Words Fancy Dies.

To make the card start by die cutting the background using an A2 (4.25" x 5.5") panel of Deluxe Smooth White cardstock. Set aside. Cut another A2 panel from the same cardstock. Cover it entirely with adhesive. (I like to use double sided adhesive sheets). Remove the backing (if there is any) and adhere the die-cut background. You will have areas with exposed adhesive. You will fill these with die-cuts.
Die-cut the same background from Coral, Papaya, Canary, Peony, Paradise and Bermuda cardstock. It's easier to work with one die cut panel, before die cutting from another color. I started with the Paradise one.
Use the negative die cuts that create the background behind the flowers and add them in the matching areas with exposed adhesive. Save or toss the rest of the panel (you can certainly save it for another project). Next, die cut the background from Coral cardstock. Fill in one of the flowers, next do the same with the Papaya, Canary and Peony cardstock. It's easiest to work with one color at a time.

Next, die cut the panel from Bermuda carsdstock. This time, you will use the positive die cut and cut out the branches and adhere on top of the white ones on the panel. Your background is done. Set it aside for now.
Die cut "Happy Birthday" three times – twice from Pitch Black cardstock and once from Black Glitter cardstock from the Glitter Paper Basics pack. Stack them together to create more dimensional die cut. Adhere to the panel.
To finish off the card, adhere the entire panel to a Dove White Top Folded Card.
 Thank you so much for stopping by. Hope you have an amazing day.

|























































































1 comment
What a beautiful card! Will add that cover plate to my wish list!