

Posted by Debi Adams
on April 15, 2020


Hello friends! Welcome to Wednesday's DIY with Debi. If you are new here, I'm glad you stopped in. My post is all about using stamps and die-cuts aside from cardmaking. I have a running list of fun projects to share but I thought that a mini "Sunshine in Your Pocket" (rather than a sunshine box) might be a perfect project for our current situation. It can be left on the door of someone that needs a bit of hope and encouragement.

Since retrieving supplies is a bit difficult these days, I decided to be resourceful and find things around my house for the base. Please feel free to substitute some things if necessary. The complete Hero Arts supply list is located at the bottom of this post. You will also need:
• Heavy cardboard/mat board. The back of a paper tablet is perfect! It just needs to be sturdy.
• Markers of your choice
• Hot glue/glue sticks
• Red tape or hot glue
• Adhesive of your choice
• Foam dots
• Score tool
• Score board
• Ribbon or twine
• Scrap of copy paper
Let's get making!
Cut the mat board 4 1/4" x 9". Cover with Dove White cardstock (if desired; my mat board was gray-ish.)

To create the pocket, cut a piece of 5 1/2" x 7 1/4" Dove White cardstock. Score in on each side 1/2", three times. This will form the pocket.

Fold scored pieces, then lay flat again.

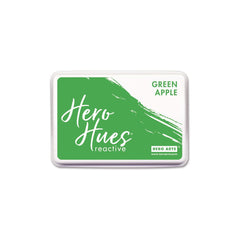
Starting with the lighter colored inks first (Lemon Drop, Green Apple), apply Reactive Inks to the middle section of the pocket using a sponge dauber, gradually adding the darker color to the outside. Mist lightly with water, blot and allow to dry.

Die-cut the Jungle Frame Fancy Die from Dove White cardstock and apply Lemon Drop, Green Apple and Blue Hawaii Reactive Inks in the same manner as the pocket background.

Adhere Jungle Frame Fancy Die to pocket center.

Adhere the pocket to mat base on all three sides, making sure that the folded portion at the bottom is folded flat. See picture. Also, add a tiny bit of glue to the folded bottom corners so they do not pop out.


Stamp, color and die-cut monkeys, bananas and sentiments from Dove White cardstock using Intense Black Ink. If desired, color white area around monkeys with marker that matches background. Adhere monkeys and bananas to pocket front using adhesive and foam dots. One monkey and sentiment will be saved for the straw.

Die-cut a circle from Dove White cardstock. Embellish with Lemon Drop Reactive Ink. Stamp unicorn eyes onto circle to make a sun. Add cheeks with markers, if desired.

Cut a 2" x 2" square from white copy paper. Score 1/4" pleats and fold to form a mask. Trim down and cut in on sides. Adhere to sun.


Attach sun to center of pocket using foam dots.

Stuff pocket with goodies. Attach sentiment and monkey to straw. Attach ribbon or twine for hanging.

Well now that I have made two of them, it's time to find a special home for them. Hoping it will make someone's day.
Here's a few extra ideas for inside the pocket but I'm sure you can come up with more:
• Sunny Days - Straws, balloons, lemon drops, yellow gum, sunglasses, cookies, pinwheel
• Gardening - Seed packet, gloves, seed labels/stakes
• Get Well - Tea Bags, lozenges, packet of chicken noodle soup, honey sticks
• Birthday - Balloons, gift card, candles, straws, cake pop
See you here next Wednesday!
XO,

|

























































































2 comments
Love this card especially at this difficult time. Wanted to do something special for people now you have shared a great idea. Thank you for your creativity.
This is adorable! What a great way to brighten someone’s day, especially when the environment is so scary for some. Adding the mask was perfect for the times. I love the monkeys and jungle cutouts, it just makes it so fun!! Thanks for sharing xx