

Posted by Janette Kausen
on January 05, 2018


Hello and welcome as we begin the countdown to the release of the January My Monthly Hero kit! Release day is Monday, January 8th at 1pm Eastern/10am Pacific. We'll be here for the next three days, sharing ideas for using both the main kit, as well as new optional add-on products that will also be available on Monday. And, remember to comment on each and every post as we'll be giving away a kit on Monday morning, before the kit launches! Now join Janette as she shares a first glimpse at this lovely kit...
We are entering the season of love and this My Monthly Hero kit is perfect to showcase it. Love, friendship and papercrafting... all the things that make my heart sing!
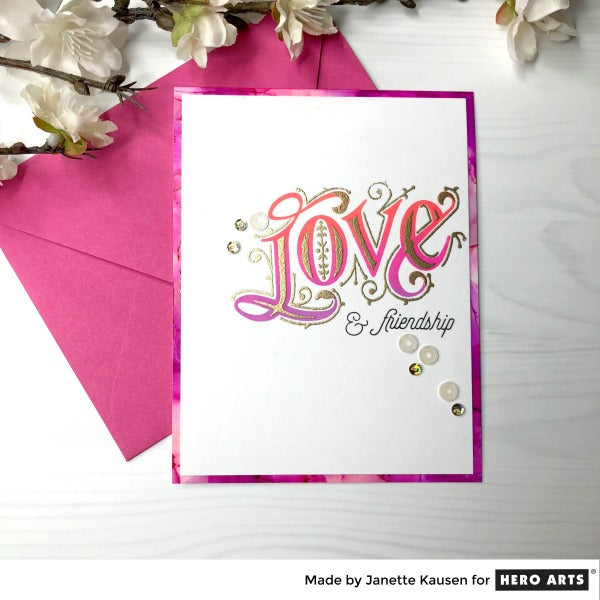
This A2 card was created by stamping Love (from the main kit) with Neon Red to Purple Ombre ink on Snow Layering Paper. Ombre ink is awesome. One dye ink pad has three individual colors built in to provide for this beautiful gradation all in one inking. Once the ink is thoroughly dry, dust with anti-static powder and stamp the second layer in Versamark ink. Emboss in Gold for a charming filigree effect.

The detail lines following the letters of L O V E to the left, right, top and bottom make it a cinch to line up. I love the intricacy and detail this stamp set provides. Stamp "& Friendship" or your choice of several other small scale sentiments in Black.

I've matted the panel on an alcohol ink background and adhered to an A2 folded card base. Apply Champagne sequins last and allow to dry.
I encourage you to give this a try. You'll be surprised at how quickly it comes together. If and when you do, be sure to tag us. We love to see what you are creating with Hero Arts!
Win a kit before you can buy it! Just leave a comment on this (and every) Countdown to Creativity post! We'll randomly draw one lucky winner from all the comments left across all countdown posts, and announce the winner first thing Monday morning, January 8th, before the kit launches at 1pm Eastern. The more you comment, the more chances to win!
Good luck!























































































618 comments
Love it!
What a great choice with the gold embossing and ombre ink! beautiful card
I can’t wait for my kit to arrive!
This is the best example of how I have seen the kit used. Thanks for sharing!
So beautiful!