Paper Pieced Peacock - Hero Arts
Posted by Ilina Crouse on July 12, 2022

Paper Pieced Peacock

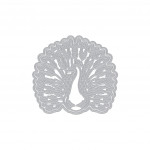
Hi everyone! Ilina here! Recently I have fallen in love with die cutting and having my card's focal point be a die cut element. The new Peacock Fancy Die is perfect for this.

To make the card start by die cutting the peacock and the frame (positioned together) from Bermuda, Paradise, and Kiwi cardstock. Next only die cut the frame from Paradise cardstock.

You will use the the Kiwi piece as the base for your peacock. Cut the body of the peacock from the Bermuda peacock. Using blue marker, color the sides of the body and then cut them out. Adhere to the kiwi colored peacock die cut. Add details using a white gel pen.

Using blue and green markers, color the feathers. Cut out the centers of the feathers from the Paradise and Bermuda peacock die cuts and adhere to the center of the colored feathers. Add details using white gel pen and black pen.

Adhere the paper pieced peacock to the Paradise base and lift the feathers up to reveal the blue underneath for more interest.

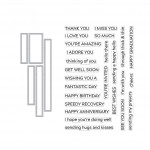
Stamp Thinking of You from the Message Strips Stamp & Cut XL set on Pitch Black cardstock and emboss in white. Die cut with the coordinating die. Set aside.

Stamp Abstract Ceiling Pattern Bold Prints using Contour ink on Deluxe Smooth White cardstock. Cut to 4" x 5 1/4". Adhere the Peacock using foam tape and then adhere the sentiment. Add the entire panel to a Sand Side Folded Card.

Thank you so much for stopping by. Hope you have an amazing day!

Click on products to shop:
DF071 Peacock Fancy Die (C)
HA ]
DC286 Message Strips Stamp & Cut XL
HA ]
CG881 Abstract Ceiling Pattern Bold...
HA ]
AF468 Contour Ink Pad - Hero Arts
HA ]
AF419 Clear Embossing & Watermark Ink...
HA ]
PW110 White Embossing Powder - Hero Arts
HA ]
PS312 Hero Hues Premium Cardstock...
HA ]
PS332 Hero Hues Special Cardstock...
HA ]
PS308 Hero Hues Premium Cardstock...
HA ]
PS323 Hero Hues Premium Cardstock...
HA ]
PS407 Hero Hues Sand Side Folded...
HA ]
PS782 Deluxe Smooth White Cardstock...
HA ]

Leave a comment

Please note, comments need to be approved before they are published.


  • Infinity Trees Christmas Card Tutorial with Stamping and Ink Blending

    BP-377

    Infinity Trees Christmas Card Tutorial with Stamping and Ink Blending

    Hey there, crafty friends! It's Marie again from Marie Nicole Designs. Are you ready for Christmas? I believe that it is never too early to begin your Christmas crafting. I try to make Christmas cards throughout the year so when December rolls around, and I’m already overwhelmed by all the events going on, I have a stash already made. Today, I’ll be sharing an easy Christmas...

  • Gift Boxes Christmas Card Tutorial with Gift Boxes and Bags Etched Dies

    BP-001

    Gift Boxes Christmas Card Tutorial with Gift Boxes and Bags Etched Dies

    Hello crafters! It’s Lisa Tilson here with you today to share a card using the Snowflake Kisses Collection by Lisa Horton. I am going to be doing a step-by-step photo tutorial showing you how to create a Christmas card using the Gift Boxes and Bags Etched Dies and I’m using a more unconventional colour palette to make it. Sometimes it’s fun to create with colours...

  • Debossed Snowflake Christmas Card Tutorial with Snowflake Background Etched Dies

    Categories:Die Cutting

    Debossed Snowflake Christmas Card Tutorial with Snowflake Background Etched Dies

    Hello there, Michelle Short here to share a step-by-step tutorial using the Snowflake Background Etched Dies from the Lisa Horton Snowflake Kisses Collection. The Snowflake Background Etched Dies are two layers which you can cut as a base layer and a top layer. For my card today, instead of having die cut layers, I thought that I would deboss the design. DEBOSSING THE DIE Place...