Reverse Masking with Animal Cooks - Hero Arts
Posted by Ilina Crouse on May 10, 2022

Reverse Masking with Animal Cooks

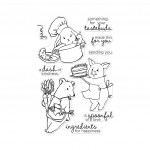
Hi everyone! Ilina here! Today I am sharing a card featuring the reverse masking technique with the new Animal Cooks set along with the Kitchen Shelf Background.

To make the card start by stamping the bear using Intens-ified Black ink and color with alcohol based markers (I used Copics) or any coloring medium of your choice. Once colored, add highlights using a white gel pen and die cut. I used the new Hero Tools Compact Cutter to die cut my image. Set aside.

Using the Rounded Rectangles Infinity Dies, cut a mask from masking paper, Post-it paper, or stencil mylar material if you have any in your stash. I used a 4 1/4" x 5 1/2" piece of stencil material and cut out the rounded rectangle in the center. I removed the center (if you use masking paper, you will do the same.)

Add the frame to an A2 size (4 1/4" x 5 1/2") piece of Deluxe Smooth White Cardstock. Using an Extra Large Blending Brush, apply Pool and Soft Pool Shadow ink. Without removing the mask, stamp the Kitchen Shelf Background using Soft Granite Shadow ink.

Remove the mask (or handmade stencil) and trim the panel to 4" x 5 1/4". Adhere the bear off to the left side and stamp sentiment using Intens-ified Black ink.

Create a top folded note card from Arctic cardstock. Adhere the panel to the note card using foam tape, craft foam, or stacked scrap cardstock.

Thank you so much for stopping by. Hope you have an amazing day!

Click on products to shop:

SB317 Animal Cooks Bundle | Hero Arts
HA ]
CM624 Animal Cooks
HA ]
DF057 Animal Cooks Frame Cuts (C)
HA ]
CG882 Kitchen Shelf Background | Hero...
HA ]
DI465 Rounded Rectangle Infinity Dies
HA ]
HT100 Hero Tools Compact Cutter...
HA ]
AF435 Intens-ified Black Ink Pad -...
HA ]
AF212 Pool Mid-Tone Shadow Ink | Hero...
HA ]
AF146 Soft Pool Ink Pad - Hero Arts
HA ]
AF226 Soft Granite Shadow Ink - Hero...
HA ]
MI007 Hero Tools Ink Blending Brush...
HA ]
PS314 Hero Hues Premium Cardstock...
HA ]
PS782 Deluxe Smooth White Cardstock...
HA ]

Leave a comment

Please note, comments need to be approved before they are published.


  • Layered Snowflakes Christmas Card Tutorial with Hot Foil Sentiments

    BP-377

    Layered Snowflakes Christmas Card Tutorial with Hot Foil Sentiments

    1 comment

    Hi, crafty friends! Lea Lawson here with you today, creating a card featuring the beautiful new Layered Snowflakes die set. I’m sharing my step-by-step process in easy to follow photos and instructions! Step by Step Instructions: [gallery type="rectangular" columns="2" link="file" size="large" ids="lealawson-layeredsnowflake-step-1.webp,lealawson-layeredsnowflake-step-2.webp"] To start, turn on your Glimmer Hot Foil System, then let it heat up. Once the green indicator light notifies that the platform...

  • Infinity Trees Christmas Card Tutorial with Stamping and Ink Blending

    BP-377

    Infinity Trees Christmas Card Tutorial with Stamping and Ink Blending

    Hey there, crafty friends! It's Marie again from Marie Nicole Designs. Are you ready for Christmas? I believe that it is never too early to begin your Christmas crafting. I try to make Christmas cards throughout the year so when December rolls around, and I’m already overwhelmed by all the events going on, I have a stash already made. Today, I’ll be sharing an easy Christmas...

  • Gift Boxes Christmas Card Tutorial with Gift Boxes and Bags Etched Dies

    BP-001

    Gift Boxes Christmas Card Tutorial with Gift Boxes and Bags Etched Dies

    Hello crafters! It’s Lisa Tilson here with you today to share a card using the Snowflake Kisses Collection by Lisa Horton. I am going to be doing a step-by-step photo tutorial showing you how to create a Christmas card using the Gift Boxes and Bags Etched Dies and I’m using a more unconventional colour palette to make it. Sometimes it’s fun to create with colours...