Hearts, Blossoms & Hugs - Hero Arts
Posted by Ilina Crouse on March 30, 2022

Hearts, Blossoms & Hugs

Hi everyone! Ilina here today! Have you checked out the Stay Crafty with A Blog Named Hero Challenge for this month?

The theme this month is Send a Hug, so I decided to make a card and send some hugs to someone. Let's be honest, we all can use a hug these days (and any day).

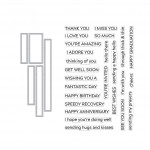
For my card I combined the Hearts & Blossoms Cover Plate and the Peace Words Fancy Dies, along with a sentiment strip using the Message Strips Stamp & Cut XL (but you can use any sentiment from any set that pairs up with "hugs" and cut it to a strip.)

To make the card start by die cutting three of the Hearts & Blossoms Cover Plate from A2-sized (4 1/4" x 5 1/2") Pitch Black cardstock panels. Adhere all layers together and put something heavy on top to make sure it dries flat.

Cut an A2 piece from Luxe White Watercolor Paper. Use the same cover plate die to make an impression (dry embossing). Use the dry embossed lines as guides color the background using watercolors of your choice. I used watercolor markers in green, blue, and yellow. Once it's dry, adhere the black frame on top. Again, put it under something heavy to dry flat.

In the meantime die cut "hugs" from White Glitter cardstock and a few more times from white cardstock (I usually use scrap cardstock) and stack them up. Let it dry.

Stamp sentiment using Intens-ified Black ink and cut to a strip. Adhere the sentiments to the panel and then to a Top Folded Dove White Card.

We can't wait to see the paper hugs you create for this month's challenge! Play along and enter here by April 3 for a chance to win one of two Hero Arts shopping spree giveaways.

Thank you so much for stopping by. Hope you have an amazing day!

Click on products to shop:
DF032 Peace Words Fancy Dies (D) |...
HA ]
DF027 Hearts & Blossoms Cover Plate...
HA ]
DC286 Message Strips Stamp & Cut XL
HA ]
AF435 Intens-ified Black Ink Pad -...
HA ]
PS777 Glitter Paper Basics | Hero Arts

HA ]
PS781 Luxe White Watercolor Paper |...
HA ]
PS323 Hero Hues Premium Cardstock...
HA ]
PS400 Hero Hues Dove White Top Folded...
HA ]

Leave a comment

Please note, comments need to be approved before they are published.


  • Layered Snowflakes Christmas Card Tutorial with Hot Foil Sentiments

    BP-377

    Layered Snowflakes Christmas Card Tutorial with Hot Foil Sentiments

    1 comment

    Hi, crafty friends! Lea Lawson here with you today, creating a card featuring the beautiful new Layered Snowflakes die set. I’m sharing my step-by-step process in easy to follow photos and instructions! Step by Step Instructions: [gallery type="rectangular" columns="2" link="file" size="large" ids="lealawson-layeredsnowflake-step-1.webp,lealawson-layeredsnowflake-step-2.webp"] To start, turn on your Glimmer Hot Foil System, then let it heat up. Once the green indicator light notifies that the platform...

  • Infinity Trees Christmas Card Tutorial with Stamping and Ink Blending

    BP-377

    Infinity Trees Christmas Card Tutorial with Stamping and Ink Blending

    Hey there, crafty friends! It's Marie again from Marie Nicole Designs. Are you ready for Christmas? I believe that it is never too early to begin your Christmas crafting. I try to make Christmas cards throughout the year so when December rolls around, and I’m already overwhelmed by all the events going on, I have a stash already made. Today, I’ll be sharing an easy Christmas...

  • Gift Boxes Christmas Card Tutorial with Gift Boxes and Bags Etched Dies

    BP-001

    Gift Boxes Christmas Card Tutorial with Gift Boxes and Bags Etched Dies

    Hello crafters! It’s Lisa Tilson here with you today to share a card using the Snowflake Kisses Collection by Lisa Horton. I am going to be doing a step-by-step photo tutorial showing you how to create a Christmas card using the Gift Boxes and Bags Etched Dies and I’m using a more unconventional colour palette to make it. Sometimes it’s fun to create with colours...