

Posted by Jessica Frost-Ballas
on July 21, 2021

Good morning, Jessica Frost-Ballas here! It seems like wedding season is slowly coming back and you might be needing congratulations cards again! If so, hopefully this easy but elegant design will give you some inspiration.
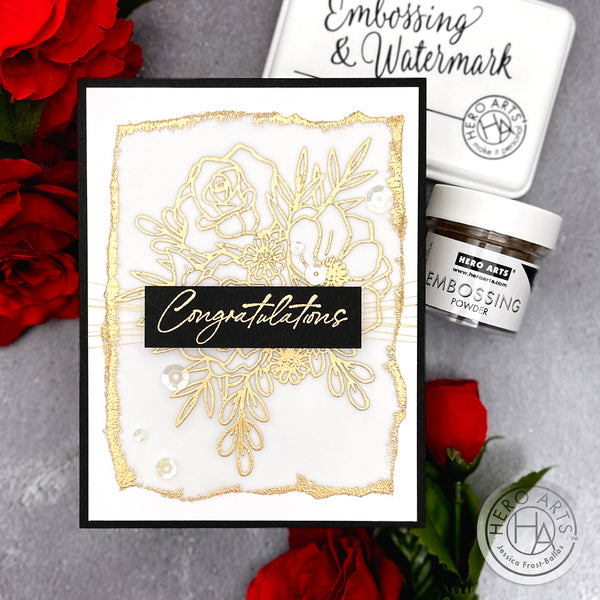
To start I took a piece of Classic Vellum Layering Paper cut to an A2 panel and tore each of the four sides. If you have a torn edge or deckle trimmer that would also work. Then I stamped the flowers from the Togetherness Bouquet set with Embossing & Watermark Ink and heat-embossed them with Brass Embossing Powder. Next I swiped my Embossing & Watermark Ink pad across the torn edges of the vellum and heat-embossed them with Brass Embossing Powder. I wanted just a hint of brass across the edges so I used a cheap paintbrush to swipe away any areas with too much powder before embossing.

Next I stamped the Cursive Congratulations wood block stamp onto Pitch Black cardstock with Embossing & Watermark Ink and heat-embossed it with the same Brass Embossing Powder. Next I adhered my vellum panel to a piece of Dove White cardstock cut to 4" by 5.25" using Precision Glue. I added the glue along the embossed edge and lines of the stamp so it wouldn't be noticeable through the vellum. Then I wrapped metallic gold thread around the panel and adhered it to the back of the white cardstock. I trimmed my sentiment down to a thin label and adhered it to the panel with foam mounting tape. Finally I adhered the white panel to an A2 panel of Pitch Black cardstock and adhered that to a Dove White Top Folding Card Base. I added a few iridescent sequins to finish the card. You could easily change up the colors of embossing powder or cardstock to fit the colors of a wedding or color the floral stamp to echo the wedding colors for a truly custom card!
And that's it for me! Thanks so much for stopping by and have a wonderful week!

Click on products to shop:
|























































































2 comments
So beautiful! I just heat embossed on vellum for the first time in this weekend’s Stamp-a-Long and can’t get over how lovely and elegant it looks! I was thinking the same thing – wedding card!
Like your use of vellum for a pretty look with style.
Melissa
“Sunshine HoneyBee”