Video: Color Layering with the Same Color Ink Pad - Hero Arts
Posted by Ilina Crouse on June 27, 2022

Video: Color Layering with the Same Color Ink Pad

Hi everyone! Ilina here! For today's card I combined a few products along with one of the six new Core Ink colors: Peony . And I am showing how you can do color layering using the same ink pad for two or more layers.

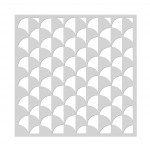
To make the card start with a piece of Deluxe Smooth White cardstock measuring 4 1/4" x 5 1/2" (A2) and secure it to the Art Deco Arches Stencil. Using a Large Blending Brush , apply Peony Core Ink. Without removing the stencil, add Glitter Hero Paste using the Palette Knife. Once you have made sure the layer is even and you have good coverage, remove the stencil and set the panel aside to dry.

Watch the video below to see how this card came to be, or click HERE to watch on YouTube.

While the panel is drying, move to stamping the Color Layering Monarch Butterfly . Stamp the first layer (the most solid one) once using Peony Core Ink. Using your heat tool on low setting, dry it. Stamp the second layer twice using the same Peony Core Ink. Again heat set it (this allows the ink to remain crisp and the layers to not bleed into each other). Using Intens-ified Black ink, stamp the third layer and emboss using Clear Ultra Fine embossing powder .

Die cut the butterfly using the coordinating dies (or fussy cut it) Set aside.

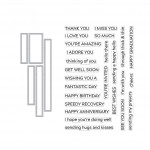
Stamp sentiments from the Message Strips Stamp & Cut XL on Pitch Black cardstock and emboss in white . Die cut the strips. Assemble the panel and add Pewter Hero Pearls for a finishing touch. Adhere the panel to a Top Folded Dove White Card .

Thank you so much for stopping by. Hope you have an amazing day!

Click on products to shop:
CM331 Color Layering Monarch Butterfly
DI603 Color Layering Monarch Frame Cuts
SA165 Art Deco Arches Stencil
DC286 Message Strips Stamp & Cut XL
AF600 Peony Core Ink Pad | Hero Arts

AF435 Intens-ified Black Ink Pad -...
PW111 Ultra Fine Embossing Powder -...
NK441 Pewter Hero Pearls
PW110 White Embossing Powder - Hero Arts
NK353 Hero Paste Glitter | Hero Arts
HT215 Hero Tools Palette Knife
MI006 Hero Tools Ink Blending Brush...
PS323 Hero Hues Premium Cardstock...
PS782 Deluxe Smooth White Cardstock...
PS400 Hero Hues Dove White Top Folded...

Leave a comment

Please note, comments need to be approved before they are published.


  • Infinity Trees Christmas Card Tutorial with Stamping and Ink Blending

    BP-377

    Infinity Trees Christmas Card Tutorial with Stamping and Ink Blending

    Hey there, crafty friends! It's Marie again from Marie Nicole Designs. Are you ready for Christmas? I believe that it is never too early to begin your Christmas crafting. I try to make Christmas cards throughout the year so when December rolls around, and I’m already overwhelmed by all the events going on, I have a stash already made. Today, I’ll be sharing an easy Christmas...

  • Gift Boxes Christmas Card Tutorial with Gift Boxes and Bags Etched Dies

    BP-001

    Gift Boxes Christmas Card Tutorial with Gift Boxes and Bags Etched Dies

    Hello crafters! It’s Lisa Tilson here with you today to share a card using the Snowflake Kisses Collection by Lisa Horton. I am going to be doing a step-by-step photo tutorial showing you how to create a Christmas card using the Gift Boxes and Bags Etched Dies and I’m using a more unconventional colour palette to make it. Sometimes it’s fun to create with colours...

  • Debossed Snowflake Christmas Card Tutorial with Snowflake Background Etched Dies

    Categories:Die Cutting

    Debossed Snowflake Christmas Card Tutorial with Snowflake Background Etched Dies

    Hello there, Michelle Short here to share a step-by-step tutorial using the Snowflake Background Etched Dies from the Lisa Horton Snowflake Kisses Collection. The Snowflake Background Etched Dies are two layers which you can cut as a base layer and a top layer. For my card today, instead of having die cut layers, I thought that I would deboss the design. DEBOSSING THE DIE Place...