

Posted by Dana Joy
on November 08, 2021

Hey everyone. It's Dana here with you today. Let me share with you how you can mass produce your holiday cards this year. You can change up the color palette with a similar image and get fabulous results.
(If you are having trouble viewing this video, please watch HERE on YouTube)
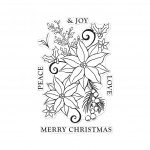
This card was made using the Merry Poinsettia Bunch stamp set. Creating this card with Brass Embossing Powder really makes a stunning card.
 To start the card, I first stamped the large poinsettia image onto
Cherry Cardstock
with
Watermark & Embossing Ink
. Next I sprinkled on
Brass Embossing Powder
and heat set it with my heat tool. I did this step twice so I could have an extra panel to ink blend on.
To start the card, I first stamped the large poinsettia image onto
Cherry Cardstock
with
Watermark & Embossing Ink
. Next I sprinkled on
Brass Embossing Powder
and heat set it with my heat tool. I did this step twice so I could have an extra panel to ink blend on.

Next, I ink blended Red Royal Ink over the two poinsettias on the second panel with a blending brush to deepen up the red color for the flowers. I wiped away any ink that was on the embossing powder with a rag. Now it was time to fussy cut out the two poinsettias with my scissors cutting right along the embossed line.

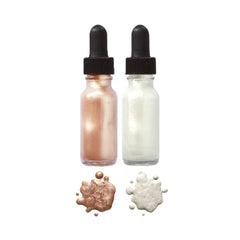
Let's talk about sentiment placement. Wanting this card to be a top folding card, I stamped the sentiment under the beautiful poinsettia spray on the first panel we heat embossed. "Merry Christmas" was stamped with the Embossing & Watermark Ink and heat embossed in the Brass Embossing Powder. Trimming down this piece allowed me to adhere it to a card base made from Dove White Cardstock . Adhering the fussy cut flowers over the panel with foam tape added dimension and splattering the entire card with Rose Gold Metallic Ink really made this card pop!
TIP: Switch out your card panel with another color and use a different embossing powder to create a similarly striking card.
Thanks for stopping by today. Hope you enjoyed the tutorial and I'll see you back here next time.

|
























































































1 comment
This card was breathtaking. I loved the red, golds and bronzes used. Amazing! Thank you for showing us your tips and techniques.