Video: Embossing on Acetate - Hero Arts
Posted by Ilina Crouse on September 27, 2021

Video: Embossing on Acetate

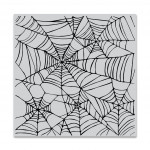
Hi everyone! Ilina here! Today I am sharing super fun shaker card using the Spider Web Bold Prints stamp that I combined with the Halloween Icons Fancy Dies , the Hero Greetings Halloween stamp set, and embossed acetate.

To make the card I started with an Acetate Card Panel and stamped a sentiment from the Hero Greetings Halloween set using Clear Embossing and Watermark ink . Next I embossed the sentiment using Black Sparkle embossing powder .

TIP: You can emboss on these Acetate Card Panels and also use them for hot foiling techniques! They are heat resistant.

Watch the video below to see how this card came to be (or click HERE.)

Next, stamp the Spider Web Bold Prints on piece of Papaya cardstock using Charcoal ink. Trim to 4" x 5 1/4". Take piece of Plum cardstock measuring 4" x 5 1/4" and die cut a circle from the Circle Infinity Dies. Add the acetate on the back of the circle window and trim off the excess.

Add foam tape and Icicle and Snowfall glitter and close off the shaker. Die cut the pot from Pitch Black cardstock and the cat and bat from Black Glitter cardstock. Also die cut one card from Kiwi for the kitty eyes. Adhere to the shaker panel. Add Black Enamel Dots and adhere to a Pitch Black note card.

Thank you so much for stopping by. Hope you have an amazing day!

Click on products to shop:
CG822 Spider Web Bold Prints
DI923 Halloween Icons Dies (D) - Hero...
CM570 Hero Greetings Halloween - Hero...
DI199 Nesting Circle Infinity Dies...
PS775 Acetete Card Panels (20) - Hero...
AF419 Clear Embossing & Watermark Ink
AF236 Charcoal Mid-Tone Shadow Ink -...
PW120 Black Sparkle - Hero Arts
PW129 Icicle Pure White Glitter
CH322 Neutrals Hero Hues Enamel Dots...
PW126 Snowfall Glitter
PS304 Hero Hues Premium Cardstock...
PS308 Hero Hues Premium Cardstock...
PS319 Hero Hues Premium Cardstock...
PS323 Hero Hues Premium Cardstock...
PS777 Glitter Paper Basics - Hero Arts

3 comments

Very cute card and liked what you used in the shaker as didn’t take away from the background scene. Thank you.

Patricia Wilson,

Very cute!!!

Cindy Graham,

Wonderful Halloween card. Not known that you can heat emboss on acetate. I just tried out the Black Sparkle embossing powder on a stencil of a Tim Holtz Shattered stencil that has a Spider Web look.
Melissa
“Sunshine HoneyBee”

Melissa SunshineHoneyBee,

Leave a comment

Please note, comments need to be approved before they are published.


  • Infinity Trees Christmas Card Tutorial with Stamping and Ink Blending

    BP-377

    Infinity Trees Christmas Card Tutorial with Stamping and Ink Blending

    Hey there, crafty friends! It's Marie again from Marie Nicole Designs. Are you ready for Christmas? I believe that it is never too early to begin your Christmas crafting. I try to make Christmas cards throughout the year so when December rolls around, and I’m already overwhelmed by all the events going on, I have a stash already made. Today, I’ll be sharing an easy Christmas...

  • Gift Boxes Christmas Card Tutorial with Gift Boxes and Bags Etched Dies

    BP-001

    Gift Boxes Christmas Card Tutorial with Gift Boxes and Bags Etched Dies

    Hello crafters! It’s Lisa Tilson here with you today to share a card using the Snowflake Kisses Collection by Lisa Horton. I am going to be doing a step-by-step photo tutorial showing you how to create a Christmas card using the Gift Boxes and Bags Etched Dies and I’m using a more unconventional colour palette to make it. Sometimes it’s fun to create with colours...

  • Debossed Snowflake Christmas Card Tutorial with Snowflake Background Etched Dies

    Categories:Die Cutting

    Debossed Snowflake Christmas Card Tutorial with Snowflake Background Etched Dies

    Hello there, Michelle Short here to share a step-by-step tutorial using the Snowflake Background Etched Dies from the Lisa Horton Snowflake Kisses Collection. The Snowflake Background Etched Dies are two layers which you can cut as a base layer and a top layer. For my card today, instead of having die cut layers, I thought that I would deboss the design. DEBOSSING THE DIE Place...