

Posted by Channin Pelletier
on December 08, 2020


Hello friends! It's Channin here and today I have a new card and video to share featuring the December 2020 My Monthly Hero Kit . In today’s video I will demonstrate the beautiful stained glass technique using the included Hope Word Fancy Die!
(If you are having trouble viewing this video, please watch HERE on YouTube.)
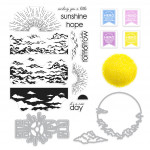
To create this card I first die cut three “HOPE” outlines using both parts of the Hope Word Fancy Die out of Dove White cardstock. I then die cut a “HOPE” base out of white cardstock using just the larger die. Next, I debossed this base with the HOPE detail die. Debossing creates an impression onto the HOPE base which allows me to see all the different sections of the word die in turn making it easier for me to color them different colors.

I colored the H, P, and E with several blue Copics and then colored the O in yellows. Once I had finished coloring the letters on the base, I adhered the two “HOPE” outlines together and then adhered them onto the base. Next, I flooded the die cut openings of the stacked “HOPE” with Glossy Accents. When I had finished filling in the openings I set it aside to dry.

Next, I stamped and white heat embossed a sentiment onto a 4 1/8” x 5 3/8 panel of Canary cardstock. I then stamped the large sun rays in Lemon Drop Reactive Ink over the upper half of the panel and again on the bottom half. Next, I moved back to my “HOPE” and finished it by adhering the final outline on top. I then adhered the Canary panel to the front of an A2 top-folding card base turned on its side and finished the card by adhering the stained glass “HOPE” to my card front.
I hope you enjoyed my card and video! Thank you so much for stopping by!

Click on products to shop:
|























































































2 comments
I was going to make these for my Happy New Year cards, but after Jan 6th I changed them. So instead of ‘hope for a new year’, they are ‘hope to brighten your day’. I’ve loved getting the responses from the recipients about how it was just what they needed. Thanks for an awesome MMH Kit!
I really like the fays of the sun, and the HOPE. I have enjoyed seeing what all of the designers have done with it so far. This is so pretty. Nice job.