

Posted by Ilina Crouse
on January 30, 2023

Hi everyone, Ilina here! Have you tried the new Hero Wax yet? It's so fun to work with. For today's project I used the Berry and Olive Hero Wax and Color Layering Stencils to add some shimmer and texture to my stamped images.

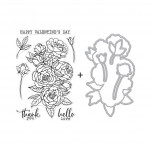
I used the Peonies Bunch stamp set, along with the coordinating dies and Color Layering Stencils.
Watch the video below (or HERE on YouTube) to see how this card came to be.
To make the card start by stamping the image on Deluxe Smooth White cardstock using Intens-ified Black ink. Immediately apply Clear Ultra Fine Embossing Powder and heat set. Using the layering stencil, ink blend Pale Tomato Core ink for the first layer. Next, ink blend Fresh Lawn ink for the first layer on the leaves.
Now you are ready for the second layers and adding the Hero Wax. The wax has some transparency when applied in thin layers, so if you would like bolder results, you can ink blend darker ink for the second layer, then add the Hero Wax.
For the second layer for the peonies, ink blend Crimson ink, then using a sponge dauber, ink blending brush, or just your finger, apply Berry Hero Wax. Remove the stencil and let it dry. You can also use your heat tool at low setting to speed up the drying process.
Next, position the second layer for the leaves, ink blend Pine ink, then using the same process as for the peonies, apply Olive Hero Wax. Let it dry completely.
Once it's dry, use the coordinating die to die cut it. You will add the image to a Pitch Black panel. If you would like a more seamless look without a white border around the flowers, use a black marker and color that border. (Like I did on my card).
Adhere the image to 4" x 5 1/4" panel using foam tape. Stamp the sentiment on a piece of Pitch Black cardstock and emboss in white. Die cut using the strip die from the Bouquet Accessories Fancy Die set. Adhere to the panel.
Create a top folding card base using a 4 1/4" x 11" piece of Pitch Black cardstock. Adhere the panel with the stamped image. Add Pewter Hero Pearls as a finishing touch. Let it completely dry before handling the card.

Thank you so much for stopping by. Hope you give this technique a try.
Have an amazing day and week!

|
























































































1 comment
I haven’t tried using the wax yet, but I’ve been eyeing it. It looks amazing! Thanks for the video. I will have to take a look at it.
I’m super curious about whether you have to heat the wax, and also about how you’re applying it. I am sure the video will be helpful for that info.
I used to teach surface design to fashion design majors, and batik was one of the techniques we did in class. It was fun, but out of all the techniques I taught, that one was the biggest hassle, because it was kind of a pain to heat the wax and then later to remove it from the fabrics we were working with. But the effects you could get with the batik technique are really and truly stunning, so it was definitely worth the effort…it is interesting to think about the possible effects you could get by using wax on paper.